|
|
|
|
Make your own 50/50 tail lights!!
Do at your own risk, I am NOT responsible if you mess up, its a good idea to have a backup set of lights if you mess up. |
|
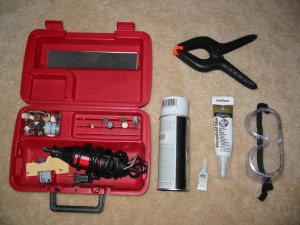 |
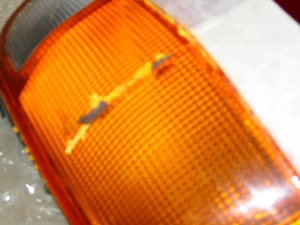
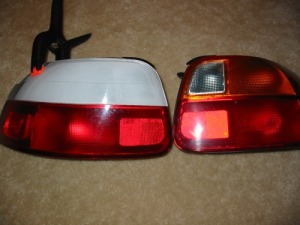
OK, before you get started its a good idea to make sure you have everything you need. The most important tool is the dremel, this is used with both a cut off wheel and a round sanding wheel. DON'T FORGET YOUR SAFETY GLASSES!! Other stuff I used was a clamp, some white paint (optional), some silver metallic spray paint, super glue, clamps, and the key to success which is some silicone sealant I got at home depot. You will also need a pair of stock tail lights and a set of altezza tail lights, You will be using the lens of the altezza lights (sense its clear) to replace the orange lens on the stockers. |
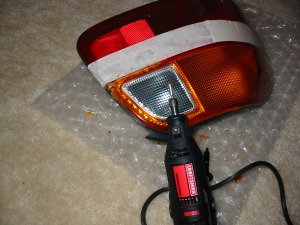 |
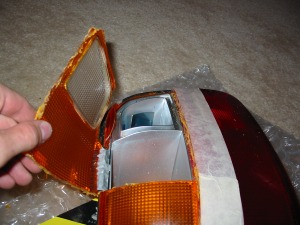
The first step is to mask off the red part of the lens, this is so that you don't accidentally mess it up or get melted plastic on it, then with the dremel and cut off wheel, slowly begin to cut along the line dividing the orange and red lens. Make sure that you cut all the way down on the edges (I used that pointy attachment to grind down with out messing up the black light housing, these pieces need to be totally separate!! |
 |
Here is a pic of the finished cut. |
 |
Next, you want to make a relief cut so that it is easier to pull out the orange stuff. (Notice that part of my cutoff wheel is stuck in there.... You will break a few of these!!) |
 |
OK, now that the orange part is completely free, except for around the edges, through them in the oven for about 10-15 minutes at 200 degrees. This will soften up the tar holding them in. while you are waiting put on some gloves so that none of the tar touches and sticks to your skin because it will hurt! |
 |
Now, just pull the pieces off, it shouldn't be too hard if you did the oven thing. |
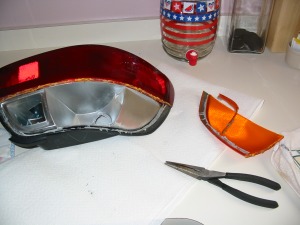 |
Here is what you get when your done!! Now its time to finish up this part of the light. |
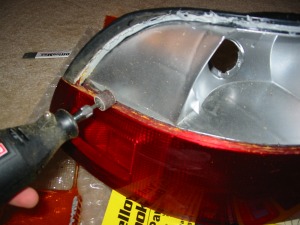 |
Now you want to sand the edge of the red that you cut, this will get rid of the orangish melted plastic and make it look better, try to make it all a nice red color (not orange or burnt orange) |
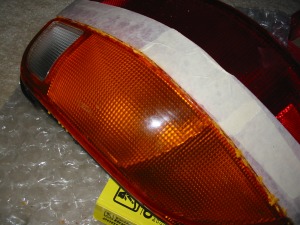
| Now do the same thing with the altezza lens being careful not to crack it like I did!! Just ignore the cracked portion, I fixed it later with some super glue, sanding and paint! | |
| Now just keep cutting and trimming until you get a really good fit. (It is helpful to go back to the oven and try to remove as much of that damn tar as you can to make the new lens fit properly. I also spray painted the back of the lens in metallic silver paint that way almost the same color as the stock light fixture, this was so that the tar and everything else would match and look good. | |
|
Once you get a perfect fit (or as close as possible), its time to decide how you want the lens to look. I chose to lightly spray mine with white paint. I also tryed that ceiling tile stuff used in lights but it was a pain and I gave up, Also, on a side note, my lights don't look this white, the camera really reflects off the paint and makes it look whiter than it is, In real life you can see through somewhat. |
|
 |
Now just tape off the sides of all seams and seal with the sealant (make sure to smooth it out with your finger and get any tough spots that down want to stay seated properly with superglue before you seal them. |
|
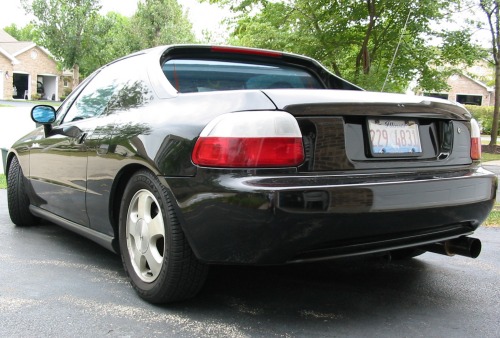
Here they are finished and installed, beautiful!!:
|
|